
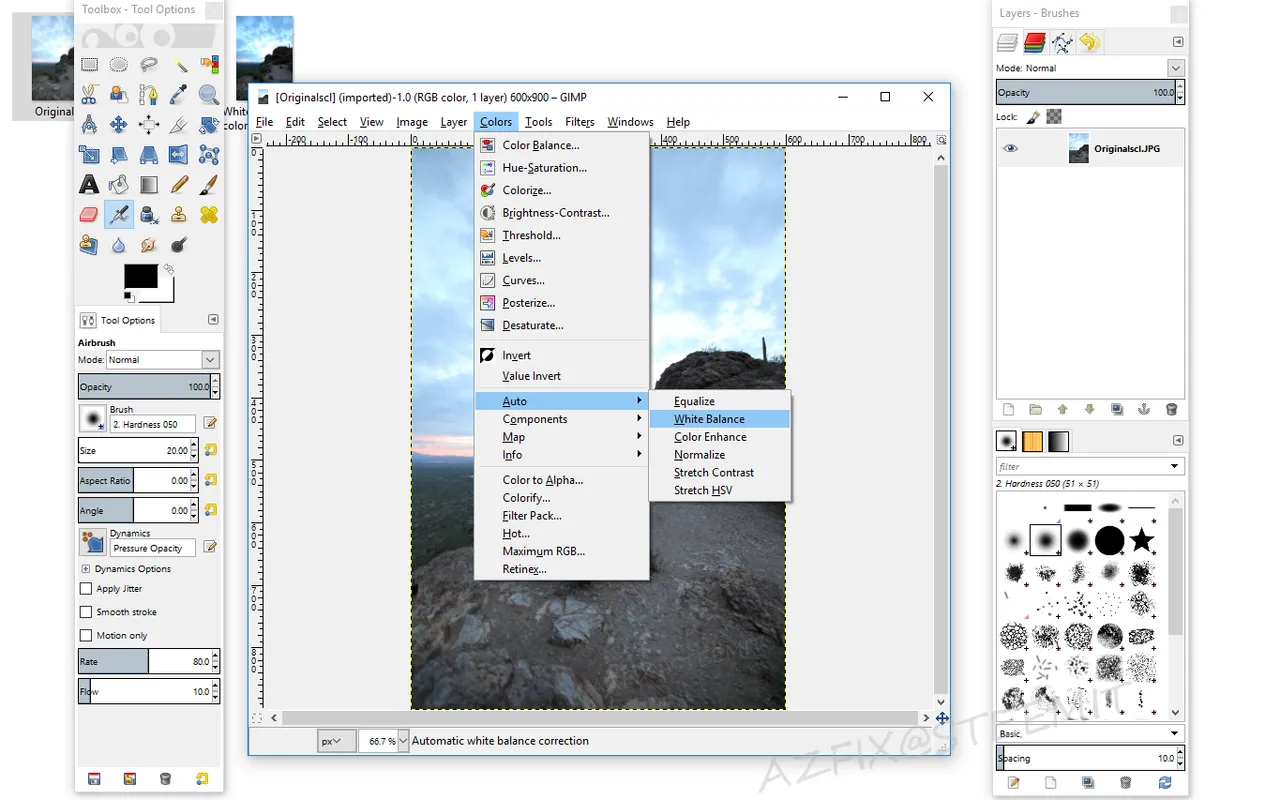
You may have seen my Gimp tutorial about creating animated gifs about a week ago. Today I wanted to share a quick and easy way to enhance your photos with some automatic tools in Gimp.
We start out with the original photo in Gimp, you should be able to right click on the photo if you are in windows and choose open with Gimp.

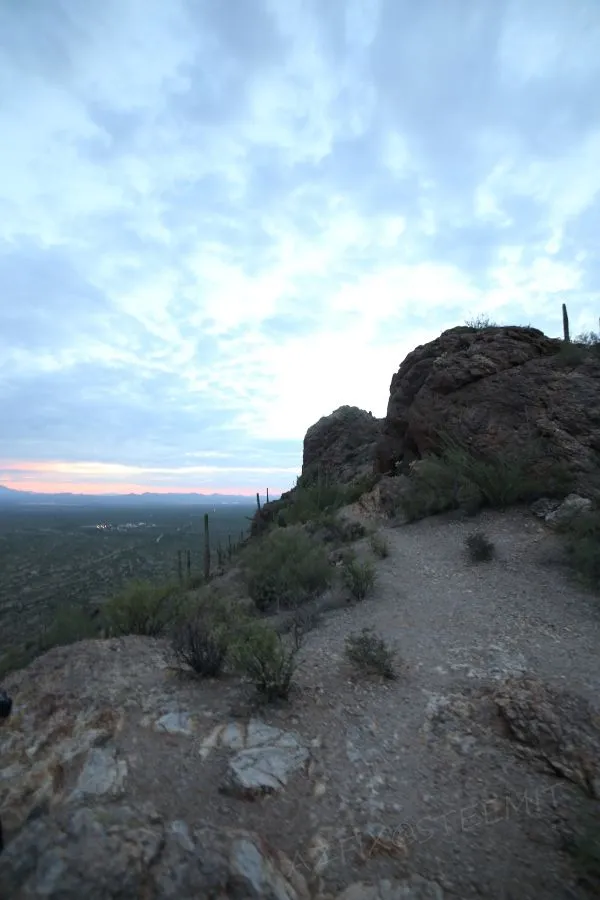
Once your photo is open go to colors and select the Auto option and choose white balance as indicated in the very first screen capture in this post. You can see from comparing it to the original that the white balance in this case makes some minor noticeable improvements.
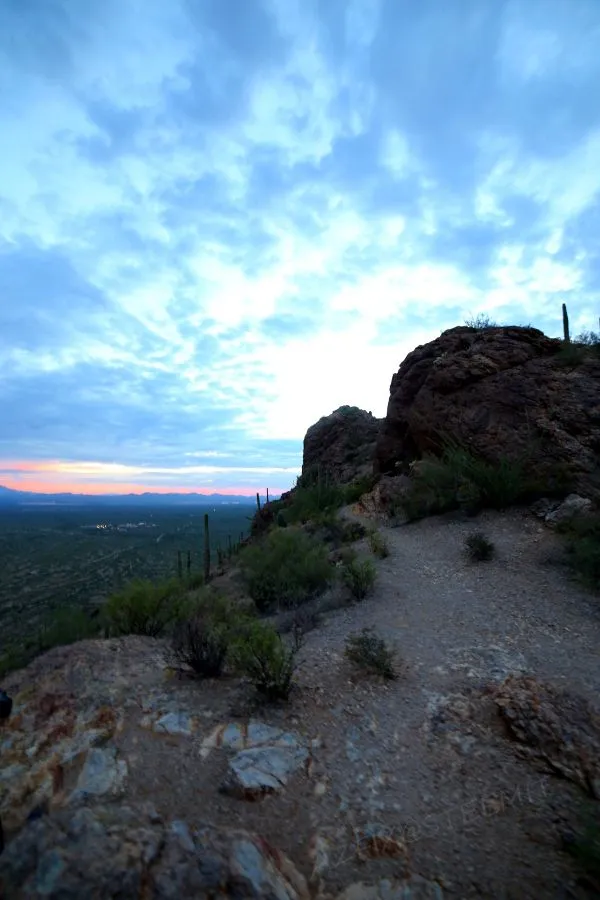
Now repeat the above process on the same photo you have open but instead of White Balance choose Color Enhance. You can see a noticeable difference between the final photo and the original at this point. You can fine tune things even more with the brightness and contrast slider located under the same colors menu.
Thanks for checking this out and I hope this can help some of you get started with the free photo editing program called Gimp. If you have any questions or comments please feel free to leave them below.